
Pink Ombre Cake for Valentine’s Day
When it comes to Valentine’s Day, romance is great and all. But everyone knows the best part of this holiday is all of the sweet treats that come along with it. While most people turn to chocolates and Conversation Hearts, I always use Valentine’s Day as an excuse to fill my kitchen with a boatload of baked goods. Let’s be real, if you’re going to eat your heart out on Valentine’s Day, you might as well opt for a seriously decadent treat.
If you’re looking for the perfect food to put you in the mood this Valentine’s Day, you came to the right place. This year, I decided to make a pink ombre cake that will give you all the feels. Especially, the hungry kind.
Feast your eyes on this gorgeous pink ombre cake.
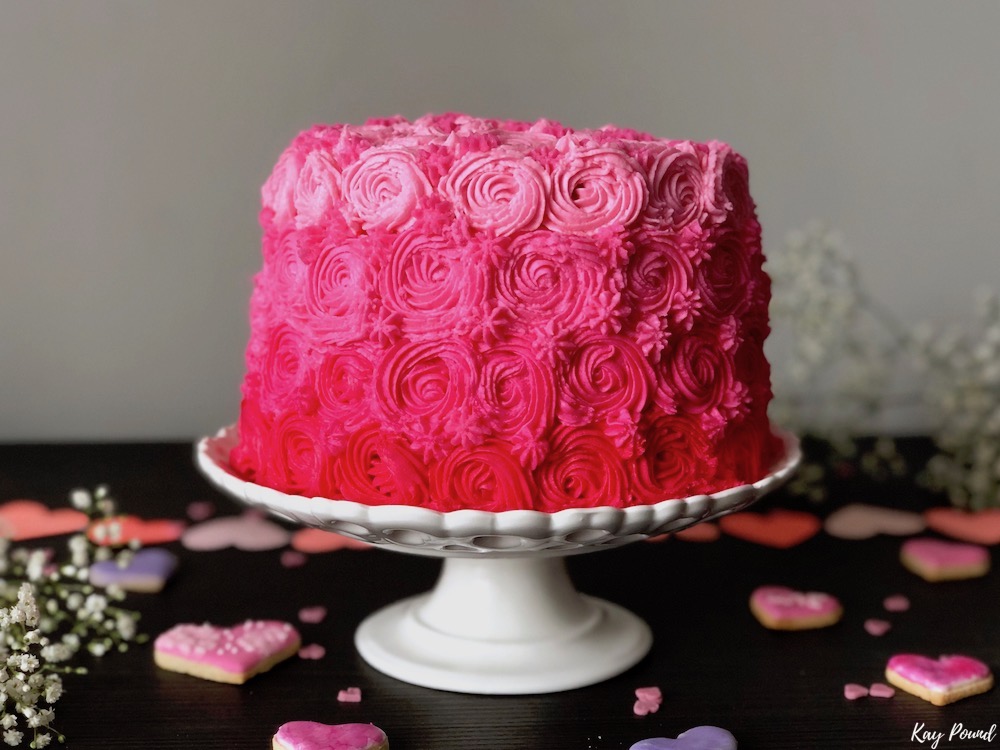
This show-stopping cake is guaranteed to make you fall head over heels in love. I mean seriously, just look at it! It’s pink, covered in roses, and romantic AF. Not to mention, totally delicious!
This sweet, rose-covered cake is perfect for any type of Valentine’s Day celebration.

You can score some brownie points by baking this swoon-worthy cake for your boo. You can host a Galentine’s Day party and binge on this cake with your BFFs. Or, you can celebrate Single’s Awareness Day by eating your Valentine’s Day-induced feelings in the form of a fabulous ombre cake. Let’s be real, who needs a Valentine when you have a date with a pair of stretchy pants and an entire cake that tastes like pure bliss?
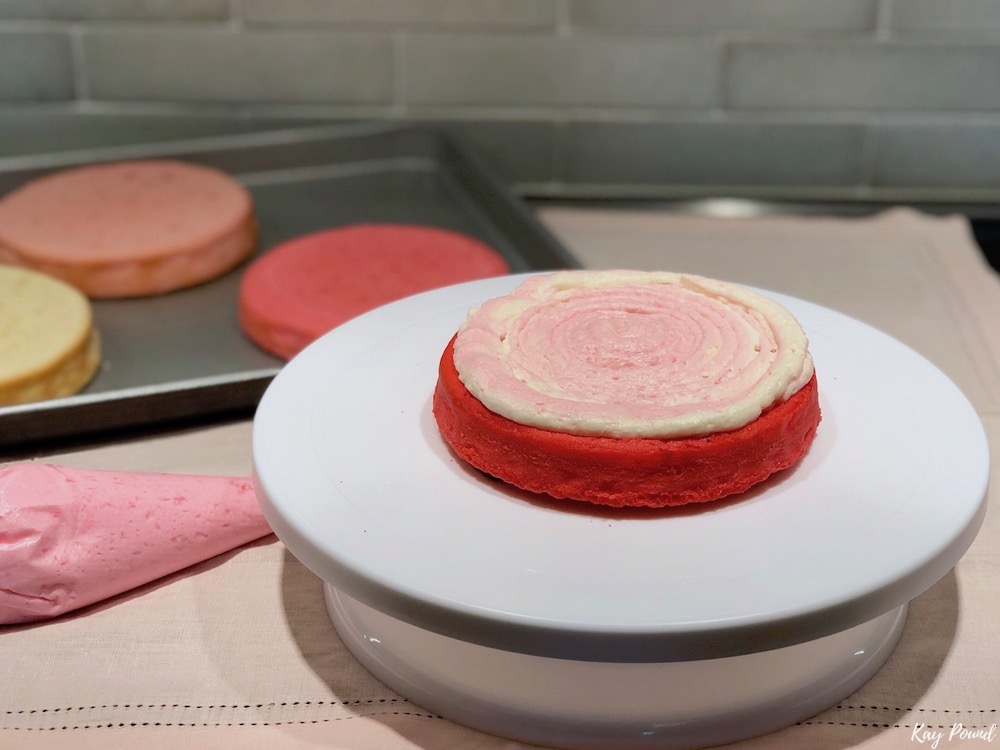
This tasty Valentine’s Day treat starts off with a basic white cake recipe.
To make this pink ombre cake, I actually modified a white cake recipe from The Stay At Home Chef to work with the ingredients I had on hand. First I made the batter and divided it into several bowls. Then, I progressively added larger amounts of pink food coloring to each bowl to create the pretty ombre layers. Once I had four different shades of cake that gradually darkened in color, I poured my batter into 6-inch cake pans and baked them in the oven.


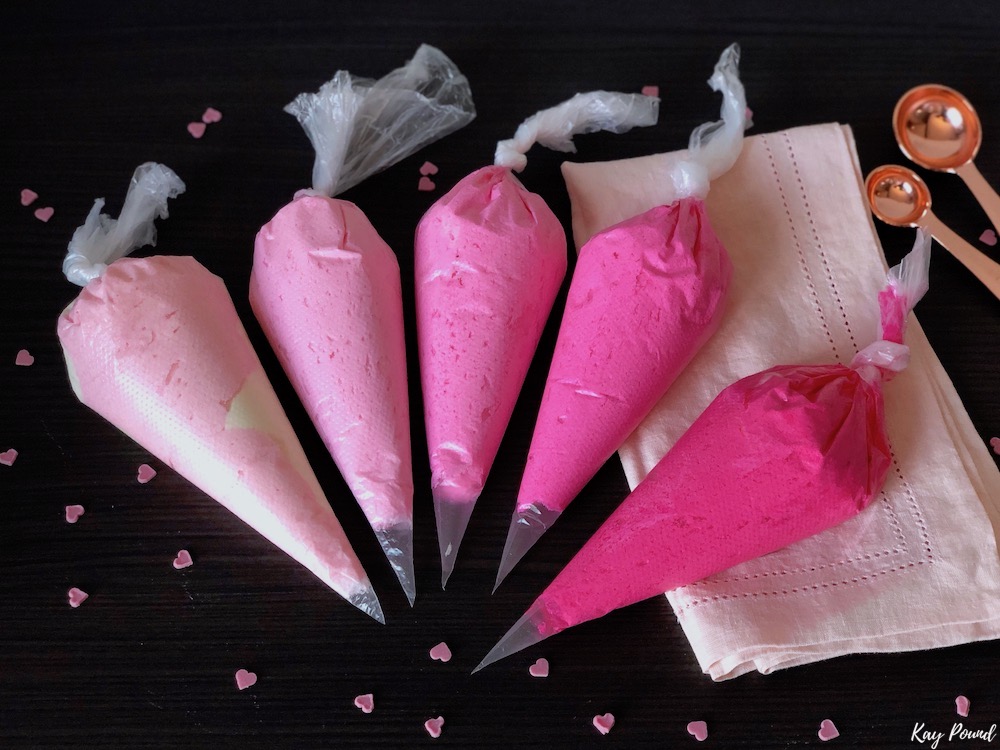
For the frosting, I used my go-to vanilla buttercream recipe. I made two batches of the frosting. Then, I divided it into several bowls and added different amounts of pink food coloring to create all of the pink shades needed for the outside of my ombre cake.
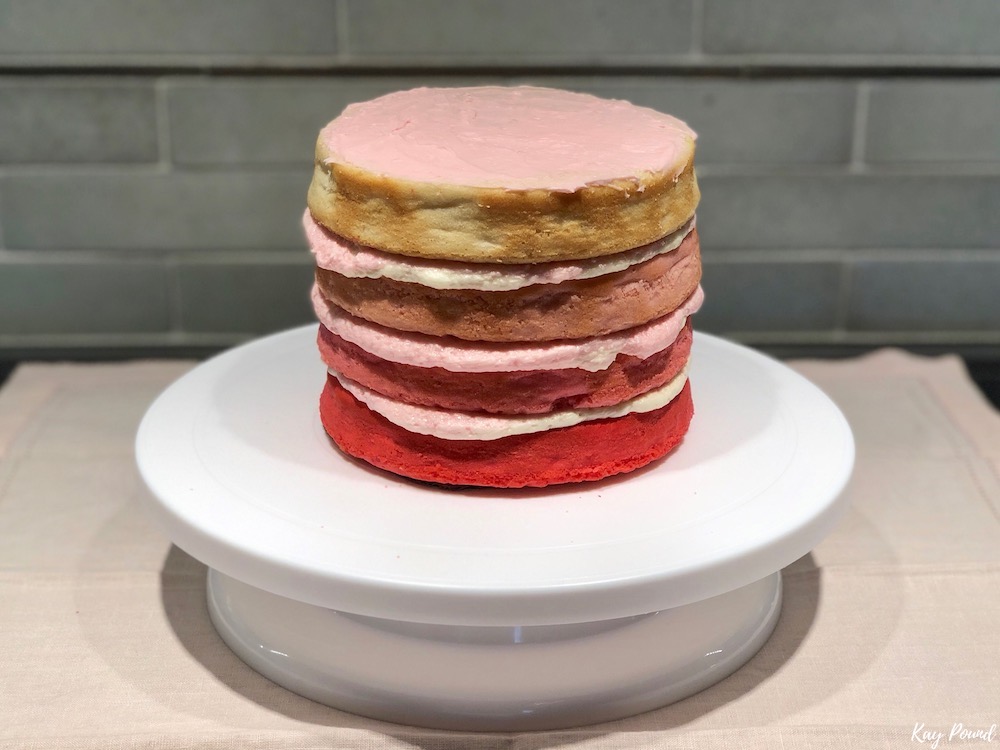
Next, I assembled my cake. Starting with the darkest layer on the bottom, I stacked my cakes and added a thin layer of frosting in between each cake. Once all of my layers were stacked, I covered the entire cake in a thin layer of frosting and smoothed out the sides with a spatula. Then, I placed the cake in the refrigerator for a few minutes to let the frosting firm up.
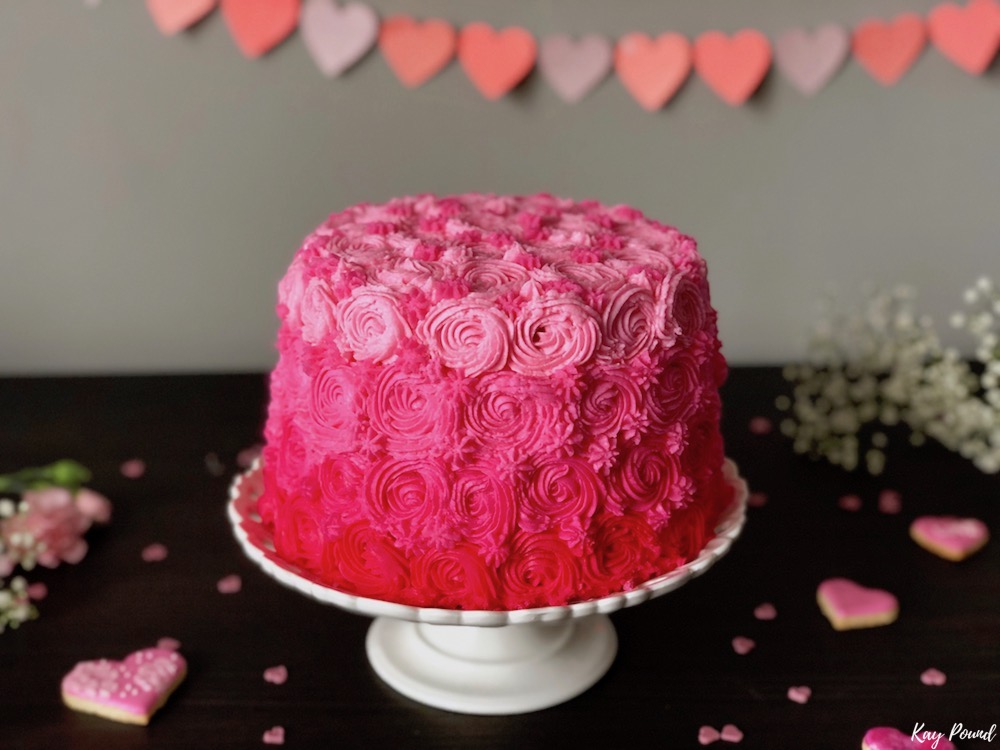
When it came time to decorate the cake, I decided to deck this dessert out in pink ombre roses. After all, the only thing that’s better than getting roses on Valentine’s Day is getting a few dozen roses that taste like delicious buttercream frosting, of course!

First, I started off by piping a row of swirly roses around the bottom of the cake, starting with the darkest color frosting. Then, I used a slightly lighter shade of pink frosting for each row of roses afterward. This created a dazzling ombre effect. After I finished covering the cake with roses, I used a star tip to fill in the gaps left between the frosting flowers.
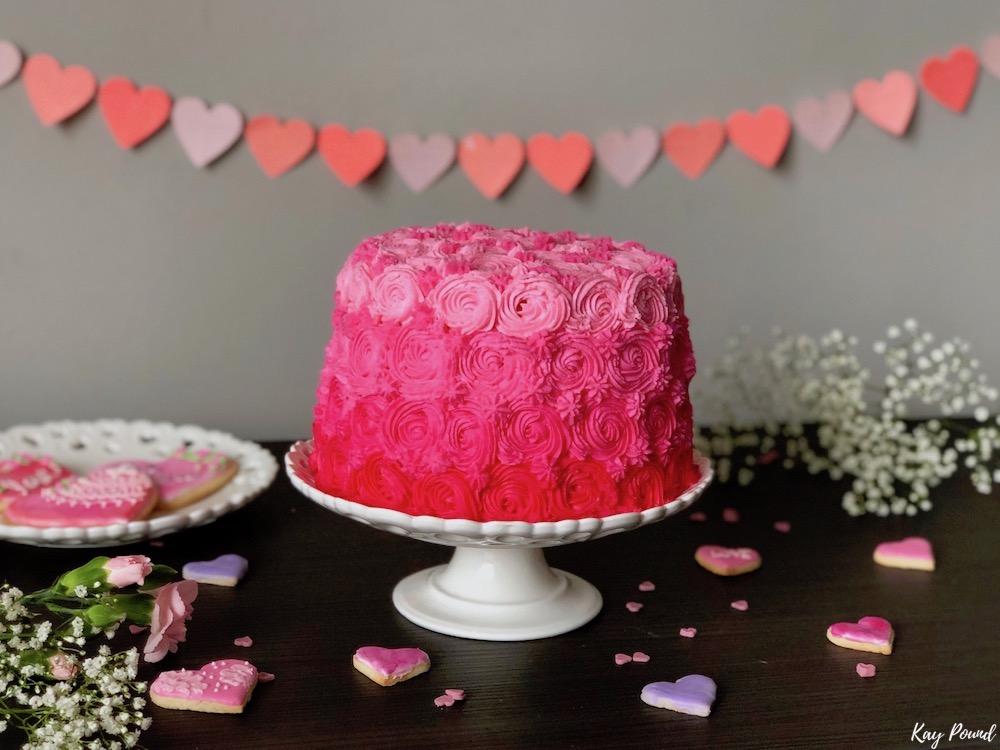
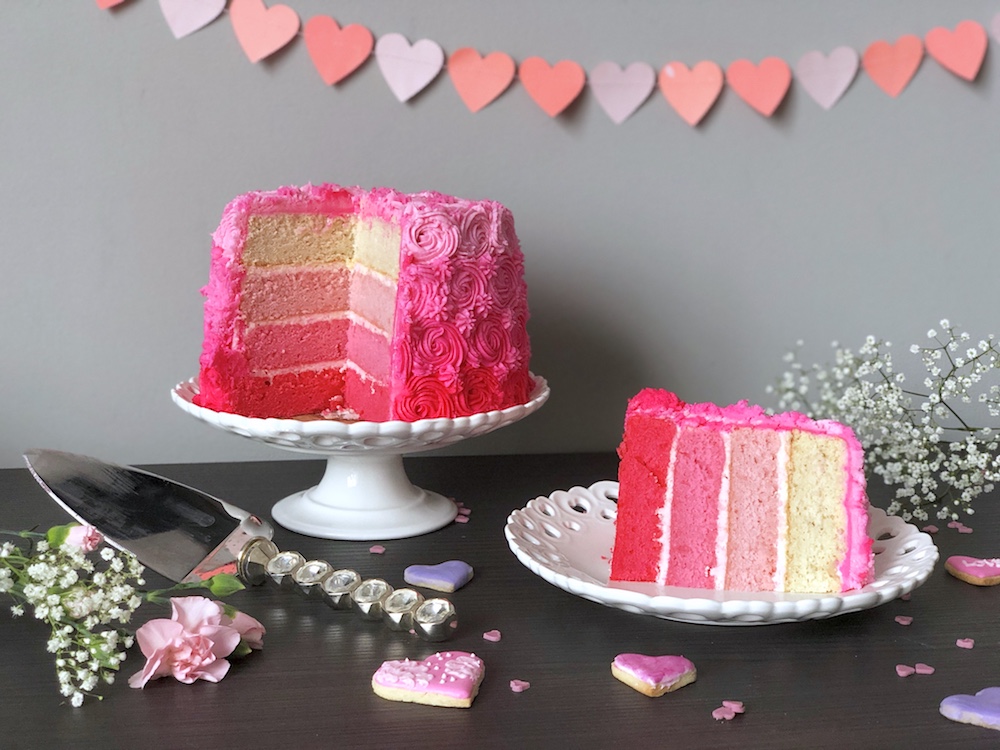
The results were downright dreamy. From the outside, this cake looks like a bright, beautiful bouquet of flowers. Once you cut into the cake, you discover the pretty pink ombre layers of cake hiding inside. When it comes to taste, the cake is light, airy, and full of buttery flavor. Plus, the colorful buttercream frosting adds the perfect amount of sweetness. Seriously, this pink ombre cake is sure to make you feel like you’ve been struck by Cupid’s arrow. Check out the recipe for this pink ombre cake below.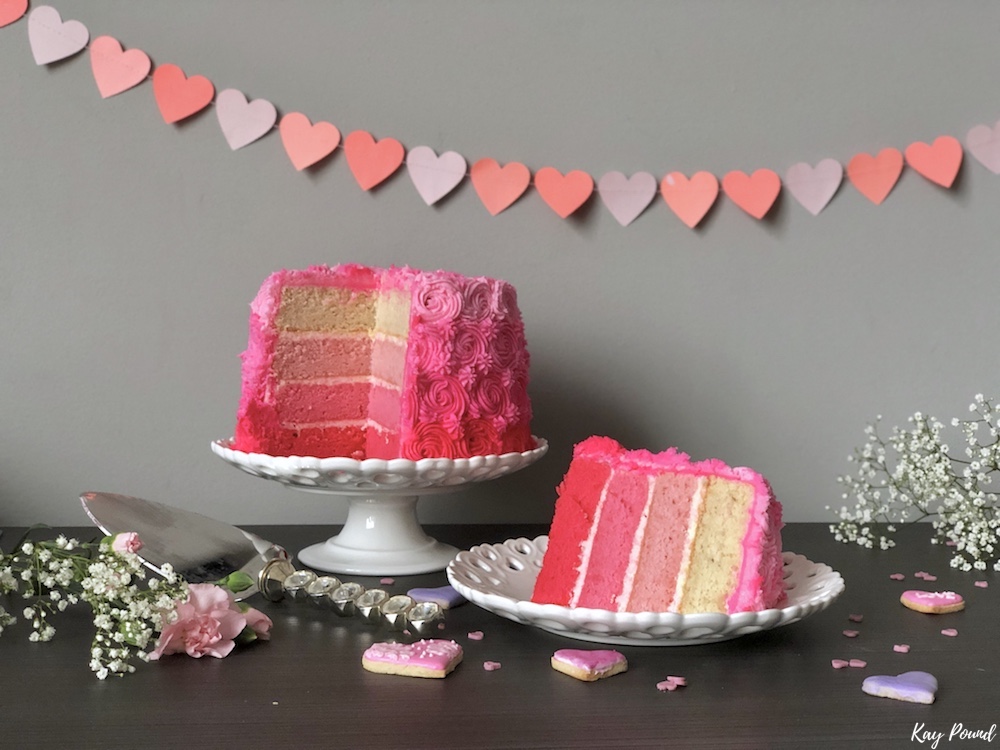
Pink Ombre Cake for Valentine’s Day
Take approximately 50 minutes. Yields 4 6-inch layers.
Cake Ingredients:
- 1 cup unsalted butter, softened
- 1½ cups sugar
- 1 tsp vanilla extract
- 3½ cups all-purpose flour
- 4 teaspoons of baking powder
- 1/4 teaspoon salt
- 6 large egg whites, room temperature
- 1½ cups almond milk
Vanilla Buttercream Ingredients:
- 1 cup unsalted butter, softened
- 3 1/2 cups confectioners’ sugar
- 1 teaspoon almond milk
- 1 teaspoon vanilla extract
- 1/2 teaspoon salt
Directions:
- Preheat oven to 350 degrees F. Grease four 6-inch pans and line the bottom with parchment paper.
- Cream the butter and sugar together in a large mixing bowl. Then add in the vanilla extract.
- Whisk together the egg whites and almond milk in a separate bowl and set aside.
- In another bowl, mix the flour, baking powder, and salt.
- Gradually add the dry ingredients to the butter mixture, alternating with the milk mixture. Mix until everything is evenly combined.
- Divide the batter into four bowls. Set the first bowl aside, this will be your white layer. Add two drops of pink gel food coloring into the second bowl to create a pale pink batter and set aside. For the third bowl, mix in 5 to 8 drops of food coloring to create a deeper pink batter and set aside. Mix 1 to 2 drops of red gel food coloring and 10+ drops of pink gel food coloring in the fourth bowl to create a deep magenta-colored batter.
- Pour each bowl into a cake pan and place in the oven. Bake for 20-25 minutes, or until a toothpick comes out clean. Remove from oven and set aside to cool.
- For the buttercream frosting, use a stand or hand mixer to beat the butter and sugar together. Mix in the salt, vanilla, and almond milk. Beat until frosting becomes light and fluffy, approximately 4 to 5 minutes.
- Divide the frosting into 4 bowls. Use pink food coloring gel to create four different shades of frosting that get gradually darker. Place the frosting in piping bags.
- To assemble the cake, stack the layers starting with the darkest one at the bottom, adding a thin layer of frosting between each layer of cake.
- Once the layers are stacked, cover the outside of the cake in a thin layer of frosting and use a scraper or spatula to smooth the sides. Place the cake in the refrigerator for 5 minutes to firm up the frosting.
- Next, take your darkest shade of pink frosting and use a medium-sized open star tip to pipe a row of roses around the bottom of the cake. Repeat this step, using a lighter shade of frosting for each row of roses. Cover the top of the cake in roses using your lightest shade of pink frosting.
- Once the cake is fully covered in roses, use a smaller star tip to fill in any holes or gaps between the flowers.
- Serve and enjoy!